

Ultimate Guide To Polishing Various Types Of Floors
Dirty floors are a common issue. Polishing different types of floors increases their life. This guide shows how to make them shine again. Keep reading to learn more!
Key Takeaways
- Polishing floors makes them last longer and look better. Each floor type, like marble or wood, needs its own polishing method.
- DIY polishing can save money. For marble, mix baking soda with water; for wood, use good polish and a flat mop. Always clean the floor first.
- Hiring professional cleaning services helps when you’re not sure how to do it yourself. They have the right tools and know which products to use without damaging floors.
- Regular maintenance keeps floors strong and shiny. It also saves money because floors don’t need repairs or replacement often.
Why You Need Regular Floor Care
Floors need regular care to look good and last longer. Polishing floors helps them stay shiny and strong. Each type of floor, like wood or marble, needs its own care method. For example, marble floors get polished once a year by pros to keep them in top shape.
Keeping floors clean means they will not wear out fast. It makes places look better and safer to walk on. Tools like microfiber cloths, mops, and vacuum cleaners are important for cleaning different surfaces well.
Using the right cleaning products keeps the floor safe from damage too.
Techniques for Polishing Different Floor Types
Different floors need different care. We’ll show you how to shine them all, from marble to linoleum.
Marble Floor Polishing
Marble floors bring beauty and strength to any space but they do need care. You can polish these floors in two main ways: doing it yourself or calling the experts. For a DIY job, use a soft cloth and gentle cleaners.
Add some polishing powder for shine. Always avoid harsh chemicals that can harm marble.
Professional cleaners have special tools like floor polishers and use safe, pH-neutral solutions to clean without damage. They might also use diamond abrasives for deep polishing, making the marble look new again.
DIY Marble Floor Polishing Tips
Polishing marble floors by yourself saves money. It also lets you control the shine. Here’s how:
- Figure out if your marble is natural or cultured. Use the natural method if unsure.
- Clean the floor first. Vacuum to remove dust and dirt.
- For natural shine, mix 3 tablespoons of baking soda with 1 liter of water.
- Apply this homemade solution to the floor.
- Let the solution dry completely.
- Start buffing with a clean cloth. Use circular motions for best results.
- Focus on small sections at a time for an even polish.
- Avoid using chemical cleaners that might harm the marble.
- After buffing, vacuum again to pick up any leftover grits.
This process brings out your marble’s natural beauty without harsh chemicals or expensive tools.
Parquet Floor Polishing
Parquet floors can lose their shine over time. You can bring back the glow with polishing and waxing. First, figure out if your parquet is laminate or hardwood. This step decides how you polish it.
For a DIY approach, start by cleaning the floor well. Use a vacuum to get rid of dirt and lint. Next, sand the floor lightly with fine-grit sandpapers. Be gentle to avoid scratches.
After sanding, wipe the floor again to ensure it’s clean. Then apply a varnish suited for either laminate or hardwood parquet floors. Let it dry as directed on the product label.
DIY Parquet Floor Polishing Tips
DIY parquet floor polishing saves money and keeps floors shiny. Follow these steps for great results.
- Start with cleaning. Use a broom or a vacuum to remove dirt. Mop with a damp cloth to get rid of remaining dust.
- Tackle stains next. Mix water and alcohol for painted or varnished surfaces; use vinegar for untreated spots.
- Choose the right wax. For a natural look, go with oil-based products. Acrylic waxes work well for a matte finish.
- Apply wax evenly across the floor. Use a soft cloth or mop, covering small sections at a time.
- Let the wax dry fully. This usually takes a few hours, depending on the product and room temperature.
- Buff the floor after drying to bring out the shine. Use a microfibre cloth or an electric buffer if available.
- Repeat waxing every few months to maintain glossiness and protect the wood.
These steps help keep parquet floors looking their best without needing professional tools or services.
Next up, let’s discuss wood floor polishing tips…
Wood Floor Polishing
Wood floors require periodic polishing. This enhances their luster and safeguards them against deterioration. In areas with high pedestrian activity, floor polishing may be needed more frequently.
For those inclined towards a hands-on approach, an electric buffer or a machine made for wood polishing can be utilized. These devices can effortlessly maintain your floors’ appealing looks.
Regular maintenance prolongs the lifespan and aesthetic appeal of wood floors.
DIY Wood Floor Polishing Tips
Polishing wood floors makes them shine. It also protects them from damage. Here’s how to do it yourself:
- Start by sweeping or using a vacuum. Get rid of dirt and tiny particles.
- Mop the floor with high-quality wood soap. Make sure it’s clean before you polish.
- Find a good wood polish. Look for products that suit your floor type.
- Use a flat mop or cloth to apply the polish evenly across the floor.
- Work in small sections, ensuring no area gets too much or too little polish.
- Let the polish dry fully. Check the product’s label for drying times—usually a few hours.
- After drying, use a buffing machine for extra shine. This step is optional but gives great results.
For large areas, consider renting a buffing machine to save time and effort.

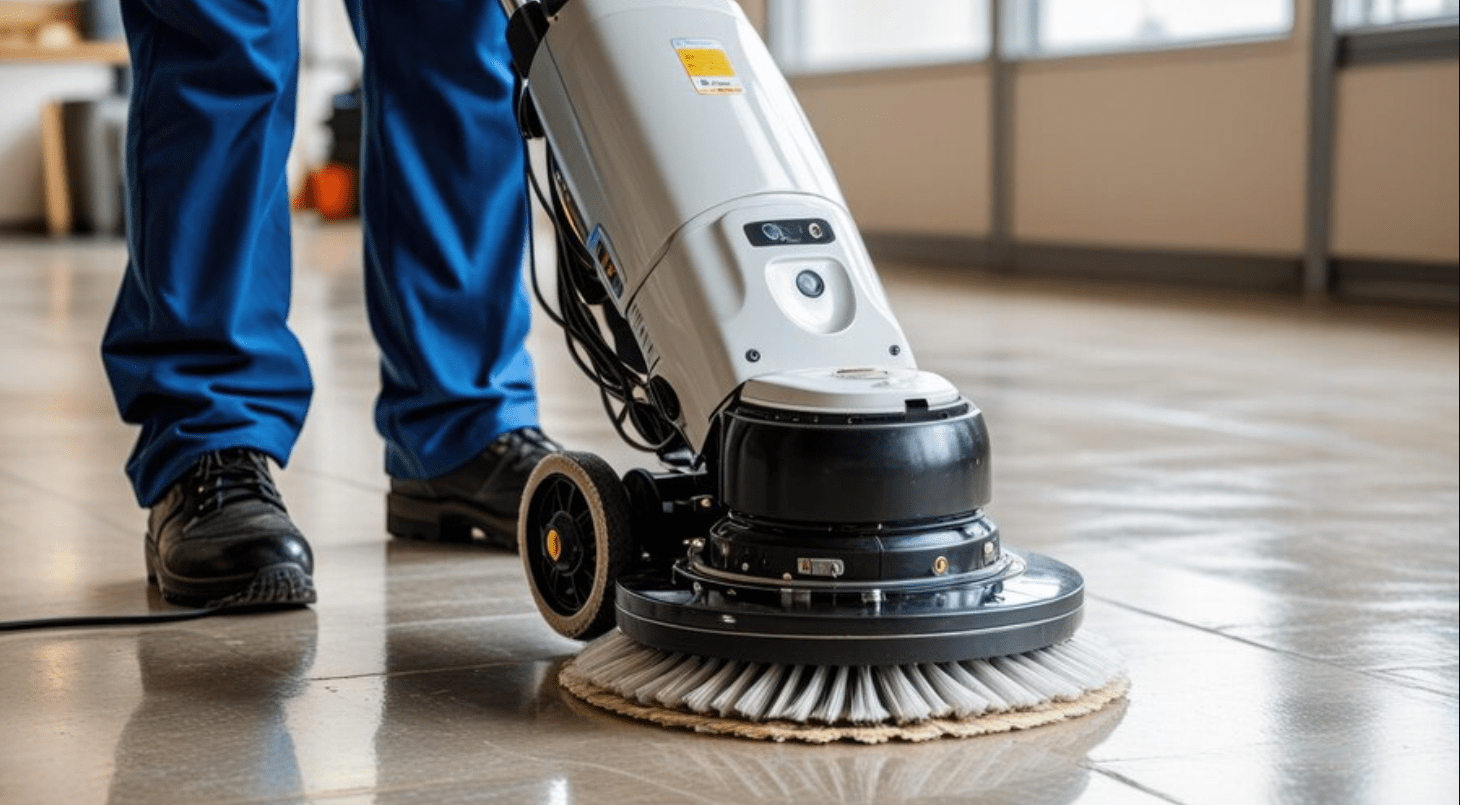
Tile Floor Polishing
Moving from wood to tile, polishing brings out the best in both. Tile floor polishing turns dull rooms bright. It gives tiles their shine back. You need high-grade wax made specially for ceramic tiles.
Apply it evenly across the surface.
Next, buff the floor using a soft cloth or sponge. For large areas, a buffer works well. This process guarantees tiles look fresh and clean.
Steps to Polish Tile Floors
Tile floors lose their shine over time. Polishing them brings back their glow. Here’s how to do it:
- Start by sweeping or vacuuming the floor to remove dirt and debris.
- Mix 1/4 cup of vinegar with a gallon of warm water for a cleaning solution.
- Mop the floor with this vinegar solution to lift stains and dirt.
- Rinse the mop and go over the floor with clean water to remove any vinegar left.
- Dry the floor using a clean, soft cloth to avoid water spots.
- Once dry, apply a thin layer of wax designed for tile flooring to add shine.
- Wait for the wax to fully dry as per the product’s instructions.
- Use a buffing machine or soft cloth to buff the tiles in circular motions until they shine.
This process uses simple tools like mops, cloths, and a buffing machine if available. The key is consistency—regular cleaning and polishing keep tile floors looking new.
Need floor polishing for your office or commercial spaces? Check out our grinding and floor polishing services for more details?
Vinyl Floor Polishing
Vinyl floor polishing needs the right mix of homemade or store-bought solutions. This step keeps floors shiny. High-quality products are key. They must match the vinyl type. Follow all steps for applying and buffing to avoid bubbles.
Professionals know how to stop bubble formation. Yet, no exact costs for services in Singapore exist now. Next, let’s talk about polishing laminate floors.
DIY Vinyl Floor Polishing Tips
Progressing beyond the fundamental knowledge of vinyl floor upkeep, it’s appropriate to explore self-directed polishing techniques. Regular polishing keeps your vinyl floors pristine and safeguards them from damage.
- Assemble the necessary items: soft cloth, sponge, one cup of vinegar, a gallon of water, baby oil, and a durable vinyl conditioner.
- Formulate the cleaning solution. Integrate vinegar, water, and a few droplets of baby oil into a pail.
- Cleanse the floor with this blend using a soft cloth or sponge. Ensure to treat all areas uniformly.
- Rinse the floor with fresh water utilizing a separate mop. This step aids in eliminating any residual cleaning solution.
- Allow the floor to dry thoroughly prior to proceeding to the subsequent stage.
- Administer the durable vinyl conditioner as instructed by the manufacturer. This measure guarantees additional luster and defense.
- If necessary, employ diamond tools to carefully eradicate stubborn stains or scratches.
In practicing these steps, you’ll be equipped to maintain a polished condition of your vinyl floors independently, without recurrent dependence on professional services.
Laminate Floor Polishing
Moving from vinyl to laminate floors, polishing them needs special steps. You can use a bought polish or mix your own. First, spread the polish with a sponge or soft cloth over the floor evenly.
Then, use a machine to buff it for shine. If you like, add some essential oils to your homemade polish for a nice smell. This makes the room fresh and clean.
DIY Laminate Floor Polishing Tips
Keeping laminate floors shiny doesn’t have to be hard. Simple steps can make them look new. Here are some tips:
- Sweep the floor first. Make sure you remove all dust and debris. A damp mop works well too.
- Mix a homemade polish using 2 tablespoons of olive oil, 1 tablespoon of white wine vinegar, and 2 cups of water.
- Pour this mixture into a spray bottle for easy application.
- Spray the polish onto the laminate floor but don’t soak it.
- Use a soft cloth to rub the polish into the floor gently.
- For extra shine, go over the floor with a buffer machine.
These steps will help keep laminate floors looking their best without much fuss!
Linoleum Floor Polishing
To polish linoleum floors, first dry clean the surface. Use a vacuum or broom for this. Then, wipe the floor with a cloth dampened in cleaner made for linoleum. Next, apply a thin layer of high-quality pH-neutral floor polish.
This makes the floor look better.
Linseed is key to making linoleum shiny. It comes from the flax plant and is in many polishes. Make sure your polish has it for best results. This process refreshes the urethane finish on linoleum floors, keeping them looking new.
DIY Linoleum Floor Polishing Tips
Linoleum floors need care to keep their shine. You can polish them yourself with the right steps.
- Sweep the floor well.
- Mix 1 cup of vinegar, 1 gallon of warm water, and a few drops of baby oil for a cleaning solution.
- Mop the floor with this mixture.
- After mopping, clean the floor again with plain water.
- Wait for the floor to dry completely; it should take about 60 minutes.
- Apply a thin coat of polish for linoleum floors.
- Let it dry for 30-40 minutes before you put on another coat.
- Use 2-3 coats for best results but wait between each coat.
- After the final coat, wait for 60 minutes before walking on the floor.
This method will make your linoleum floor look new and shiny.
Advantages of Consistent Floor Maintenance
Keeping floors in top shape extends their life. This means they look good longer and are stronger, too. Floors that get regular care don’t need fixing or replacing as often. This saves a lot of money over time.
Using professional services for grinding and floor polishing can give the best results. Experts know how to make floors shine and keep them that way. They use special tools and products to protect the floor from damage, making it last even longer.
Hire Professional Cleaning Services to Maximise Your Efficiency
In today’s fast-paced world, maintaining a clean and organized space can be a challenge. That’s where a professional cleaning service becomes invaluable.
Not only does it save you precious time and money, but it also enhances air quality, reduces stress, and boosts productivity—ultimately creating a healthier, more efficient environment.
When it comes to professional cleaning, Uni Hygiene stands out. Our team of seasoned experts delivers tailored cleaning plans designed to meet your specific needs and budget.
With just a click, you can effortlessly access our streamlined request process and connect with verified providers in your area.
Don’t miss out on the benefits of a spotless space—visit our commercial cleaning services and request your service today!
FAQs
1. What is polished concrete?
Polished concrete is a type of floor that’s been treated with a chemical densifier and ground down to achieve a shiny, mirror-like finish.
2. How does the process of polishing various types of floors work?
The process involves grinding the floor surface then applying a hardening agent. It’s followed by further grinding, polishing, and sealing for protection.
3. Can all types of floors be polished?
Not all floors can be polished – it largely depends on the material. Concrete is most commonly polished due to its durability and aesthetic appeal.
4. What are the benefits of having polished concrete floors?
Polished concrete floors are easy to clean, require less maintenance than other flooring types, and offer high light reflectivity which can brighten up spaces.